List views in Salesforce are powerful tools that help you quickly view, filter, and act on records without the need for reports. Whether you’re a sales rep managing leads or a support agent tracking cases, mastering list views can greatly enhance your productivity. This guide will walk you through how to create, filter, and customise list views with ease.
Creating a New List View
To get started, follow these simple steps to create your own list view:
- Navigate to the object tab (for example, Leads, Opportunities, or Cases).
- Click on the gear icon ⚙️ and select New.
- Give your list view a descriptive name, such as “Opportunities over £30,000”.
- Choose who can see the list view: just you, or all users.
- Click Save.
Now you have a blank canvas to work with!

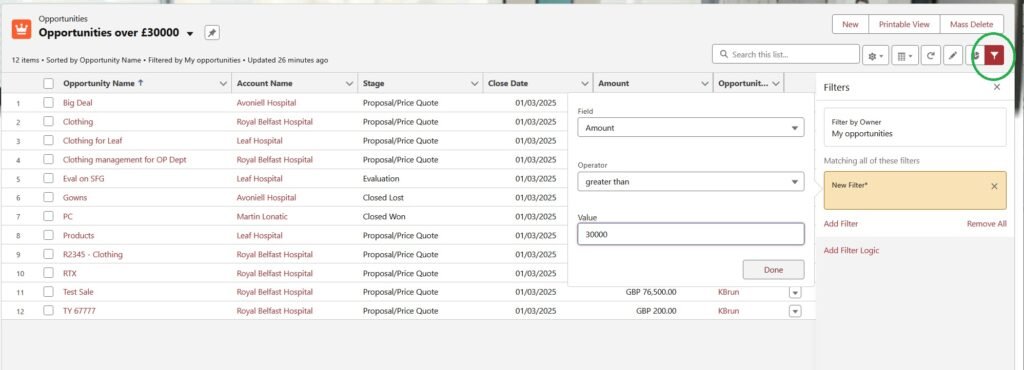
Adding Filters
Filters allow you to narrow down the records shown in your list view. Here’s how to add them:
- Click on the filter icon (looks like a funnel).
- Select Add Filter.
- Choose a field, like Status or Amount.
- Set the filter criteria, such as “Amount greater than 30000”.
- Click Done and then Save.
By applying filters, you ensure you’re only seeing the records that matter most.
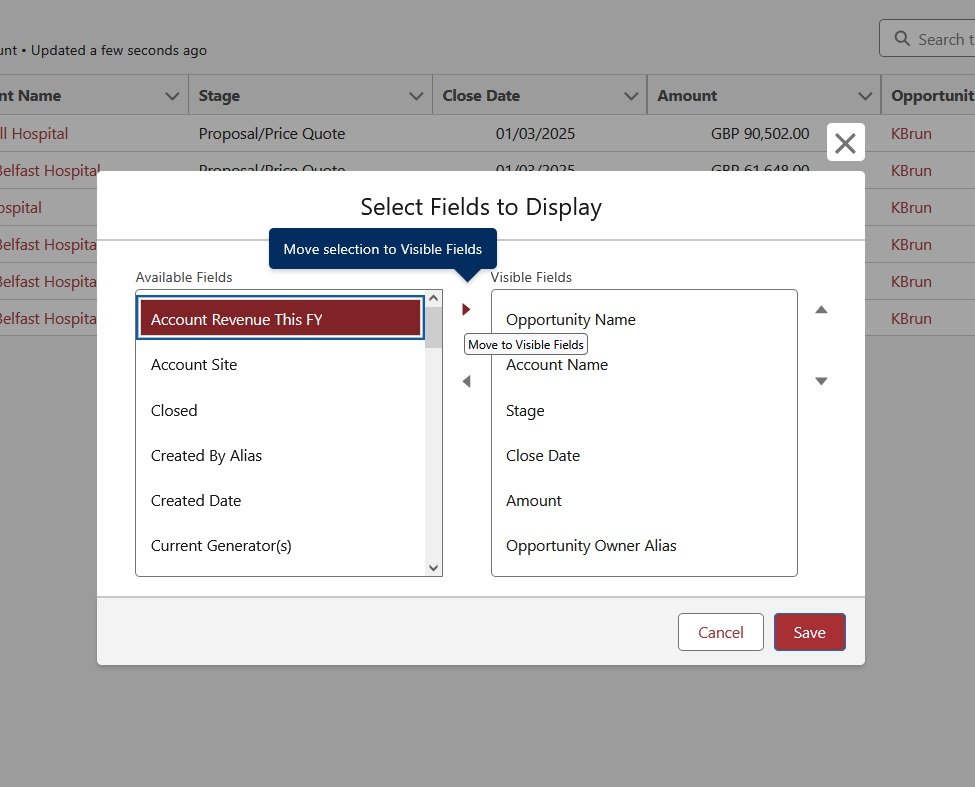
Customising the Columns
To make your list view even more useful, customise the columns:
- Click the gear icon ⚙️ and select Select Fields to Display.
- Choose which fields you want to add or remove.
- Use the arrows to adjust the order of the columns.
- Click Save.
A well-organised list view makes it easier to spot trends and key information at a glance.
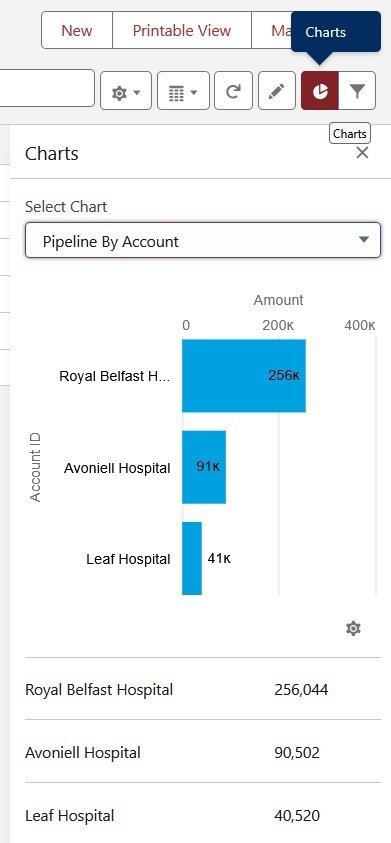
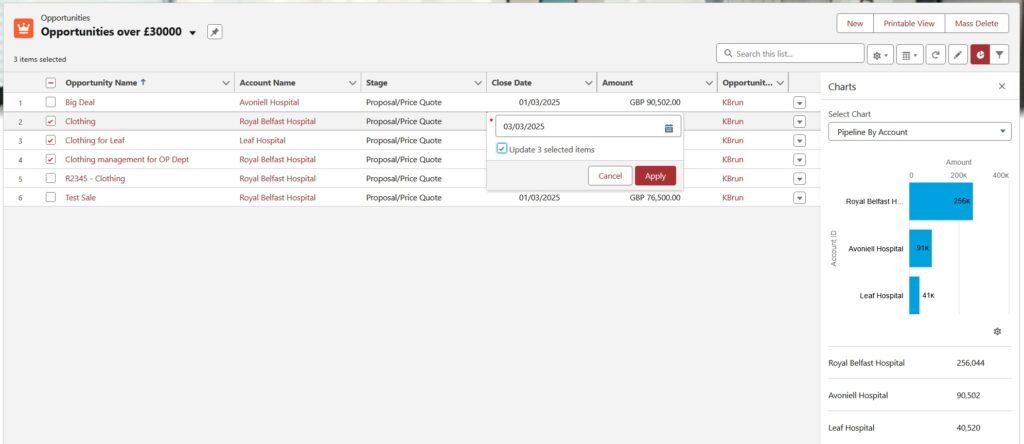
Using Charts with List Views
Visualising data can often highlight insights you might miss in a table. To add a chart:
- Open your list view.
- Click on the chart icon.
- Select New Chart.
- Pick a chart type (bar, line, or donut).
- Choose the fields for your chart.
- Click Save.
Charts turn your list view data into a visual snapshot, helping you identify trends quickly.
Inline Editing and Mass Actions
Salesforce also lets you update records directly from a list view. To use inline editing:
- Ensure your list view uses a single record type.
- Double-click a field, like Stage or Close Date.
- Make your changes and click Save.
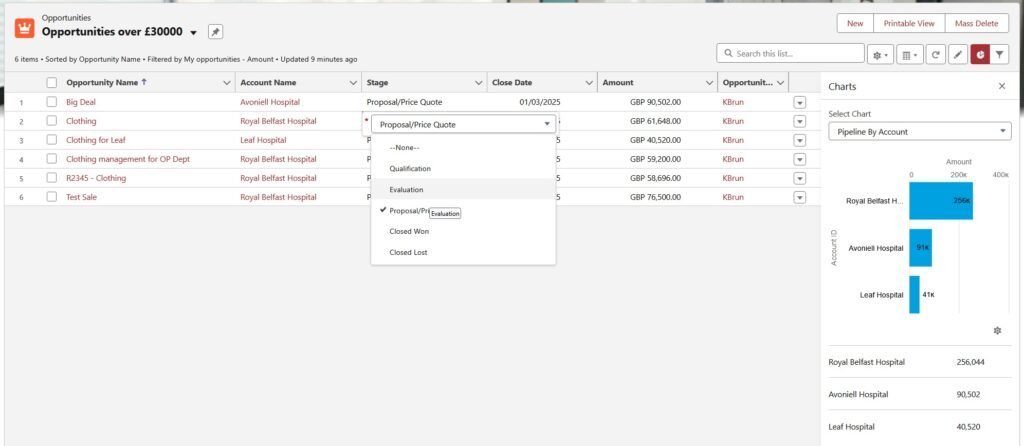
For mass actions:
- Select multiple records using the checkboxes.
- Click the field you wish to update – like Stage.
- Confirm your changes.
These tools help you save time by managing records without opening them one by one.
Mastering list views means you can work smarter, not harder, in Salesforce. From creating tailored views to adding dynamic charts, these simple tools can make a big impact on your daily workflow.
Looking to build even more custom functionality in Salesforce? IntegraLogic is here to help you design tailored solutions that fit your business perfectly. Let’s chat about how we can make your Salesforce experience even more powerful!