In Salesforce, managing user permissions is key to ensuring the right people have access to the right tools and data. While Profiles are commonly used, Permission Sets offer more flexibility and control. In this guide, we’ll walk you through creating a Permission Set and explain why they’re often a better choice.
What Are Permission Sets?
Permission Sets are tools in Salesforce that allow you to grant additional permissions to users without changing their profile. Think of them as “add-ons” that give users extra access to specific features, objects, or data. Unlike profiles, which apply to all users in a group, Permission Sets can be assigned to individual users as needed.
Why Use Permission Sets Instead of Profiles?
- Flexibility: Profiles are broad and apply to all users with that profile. Permission Sets let you give specific permissions to individual users without affecting others.
- Easier Maintenance: Instead of creating multiple profiles for small differences, you can use Permission Sets to add or remove permissions as needed.
- Scalability: As your business grows, Permission Sets make it easier to manage user access without overhauling your entire system.
Step-by-Step Guide: How to Create a Permission Set
Step 1: Log in to Salesforce
- Go to your Salesforce instance and log in with your admin credentials.
Step 2: Navigate to Permission Sets
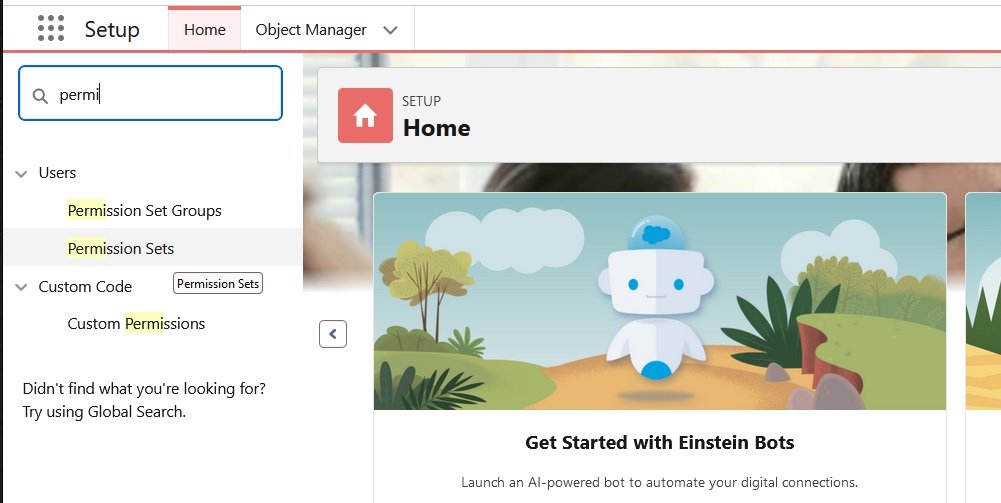
- Click on the Setup icon (gear icon) in the top-right corner.
- In the Quick Find box, type “Permission Sets” and select it from the menu.
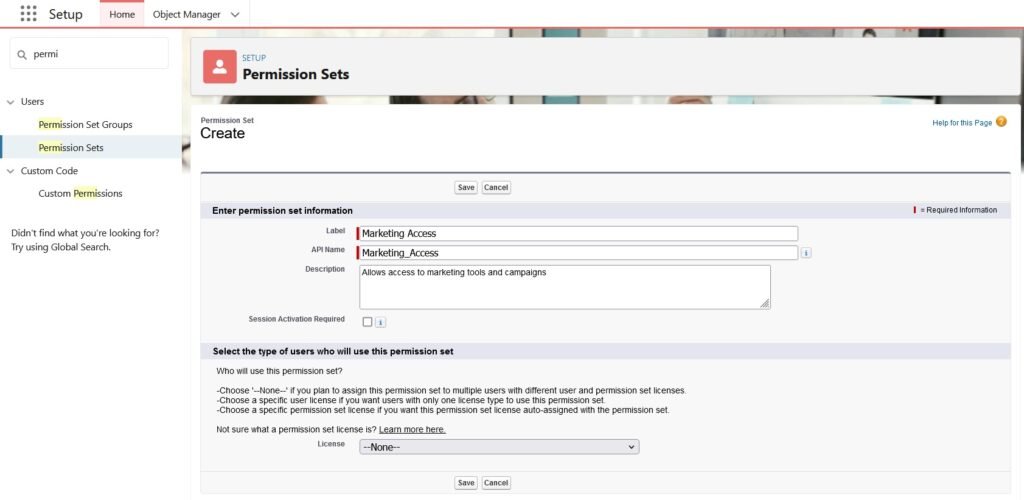
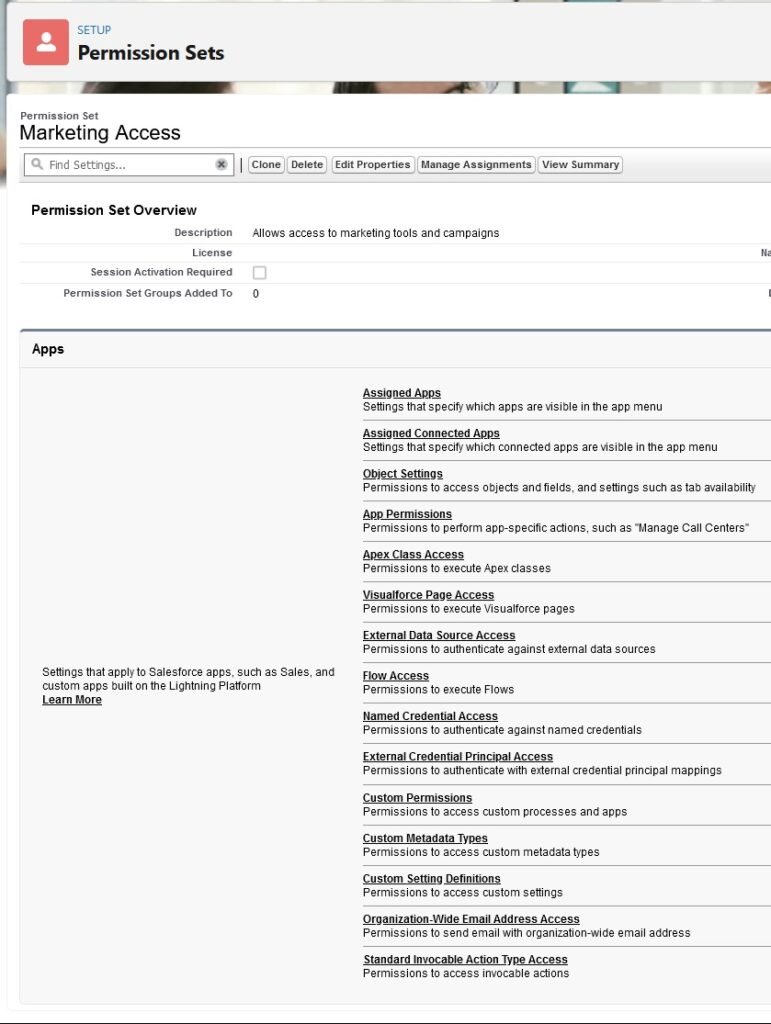
Step 3: Create a New Permission Set
- Click the New button to create a new Permission Set.
- Fill in the required fields:
- Label: Give your Permission Set a name (e.g., “Marketing Access”).
- API Name: This will auto-fill based on the label.
- Description: Add a brief description (e.g., “Allows access to marketing tools and campaigns”).
- Click Save.
Step 4: Assign Permissions
Once the Permission Set is created, you’ll need to assign specific permissions. Here’s how:
Object Permissions:
- Scroll down to the Object Settings section.
- Click on the object you want to grant access to (e.g., Campaigns).
- Enable the permissions you want (e.g., Read, Create, Edit, Delete).
Field Permissions:
- Under Field Permissions, select the fields you want to grant access to.
- Enable Read Access or Edit Access as needed.
App Permissions:
- Scroll to the App Settings section.
- Assign access to specific apps (e.g., Salesforce Marketing Cloud).
System Permissions:
- Under System Permissions, enable any additional system-wide permissions (e.g., “Export Reports”).
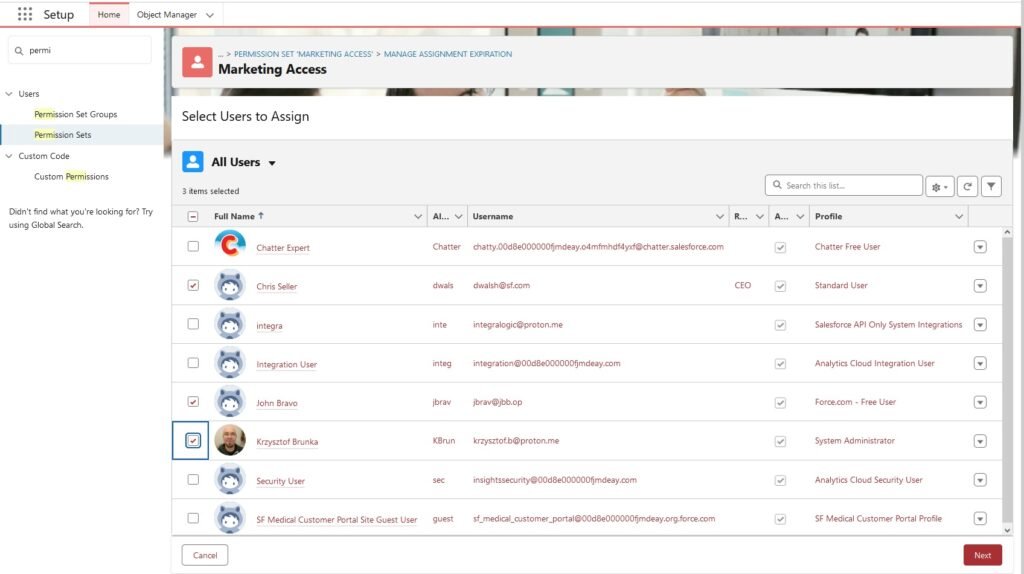
Step 5: Assign the Permission Set to Users
- Go back to the Permission Sets page.
- Find the Permission Set you just created and click on its name.
- Click Manage Assignments.
- Click Add Assignments.
- Select the users you want to assign the Permission Set to and click Next and then Assign.
When to Use Permission Sets
Here are some common scenarios where Permission Sets are more effective than profiles:
- Temporary Access: Granting a user temporary access to a feature or object.
- Specialised Roles: Giving specific permissions to users with unique roles (e.g., a marketing manager needing access to campaigns).
- Testing: Allowing test users to access new features without changing their profile.
Permission Sets are a powerful way to manage user access in Salesforce. They offer flexibility, scalability, and easier maintenance compared to profiles. By following this guide, you can create and assign Permission Sets to ensure your users have the right access without complicating your system.
If you need help setting up Permission Sets or managing your Salesforce instance, feel free to reach out to me at IntegraLogic by clicking the button below.